If you maintain Pratt & Whitney Canada PT6 engines, there are many inspections and maintenance events that need to be performed at scheduled intervals to ensure the continued safe operation of the engines. Although none of these inspections is any less critical or less important, a particular inspection that can dramatically affect the health of the engines is fuel nozzle inspection. In this article, we will discuss fuel nozzle inspection, give some maintenance tips, and also discuss the entire fuel system as it pertains to engine health.
Warning
In the majority of the technical articles I write, I like to emphasize the importance of using the proper procedures by saying something like, “Always refer to the manufacturer’s maintenance manual” or something to that nature. I don’t want that point to go unnoticed in this case, so let me emphasize — ALWAYS refer to the manufacturer’s maintenance manual, overhaul manual, etc. whenever performing any maintenance or inspection. This is especially critical when it comes to fuel nozzles.
In addition, fuel nozzle inspections should not be taken lightly, and should only be performed by trained, qualified individuals. Peter Boissonneault Sr., Chief Inspector for Hyannis, MA-based Heritage Turbines, shares, “We have not had much luck with shops doing their own nozzles. Fuel nozzle inspection is typically delegated to the newbie, and that is backwards. You really need someone who knows what they are doing and what they are looking for.”
Fuel nozzle types
There are two types of fuel nozzles on PT6 engines — simplex and duplex. With simplex fuel nozzles, you have two different nozzles — primary and secondary. Each nozzle has a single orifice. Simplex nozzles are typically set up as either all primary (in some engines) or in a ratio of 7 to 7 or 10 to 4 primary to secondary. The configuration depends on the engine model and the configuration status of the engine.
Upon startup, fuel is distributed to the primary nozzles only. At a given N1, the secondary nozzles kick in.
With duplex nozzles, fuel is introduced in a similar way as with a simplex nozzle system — in two stages with primary spray upon startup and secondary kicking in as the engine spools up. The difference is that in a duplex nozzle system, all of the nozzles are identical. Each one has two passages and two concentric ports in the tip that spray fuel. The primary and secondary are, in effect, within each nozzle.
Nozzle removal
Here’s a good place to throw in a caution. If you are going to remove all of your fuel nozzles for inspection, be sure that the igniters or glow plugs are NOT removed at the same time. If they are removed, the combustion chamber outer liner may go out of alignment. “It happens,” shares Boissonneault. “Often, it’ll fall down just enough to where the lips of the large exit duct and the combustion liner won’t match back up. Then you basically have two choices — you could sit there for hours and try to fight it, or you could split the case and put it back together.”
Here’s another tip to consider when removing fuel nozzles. If you are having a problem with your engine (or if you just want to be careful), you may want to consider marking the position of each nozzle relative to the engine for troubleshooting purposes. “We normally clean the nozzles coming in prior to flow checking them,” shares Don Beaulieu, shop manager at Heritage Turbines. “But if a customer is having a problem and wants a pre-flow check, they can mark the positions the fuel nozzles are removed from before sending them in. We can then do a quick pre-flow check and let them know of any discrepancies.”
And how should one mark them? “You can mark them with a Sharpie,” says Beaulieu. “If you have a hard time marking them because of fuel residue, you can put them in small plastic bags and mark the bags.”
Fuel nozzle removal is spelled out in the maintenance manual. You basically remove the safety wire, remove the bolts (or nuts in some newer engines), slide the transfer tubes out (i.e. into the adjacent fuel nozzle adapter), and remove the nozzle and sheath assemblies from the engine. Care must be used whenever handling fuel nozzles. In the removal process, be careful when removing the transfer tubes not to damage them.
Beaulieu shares, “The transfer tubes are made of aluminum and are relatively delicate. They bend easily. Be careful when handling them. The biggest thing I tell mechanics is to NOT use vise grips, or the blades of your screwdriver or tools like that. Use non-marring tools like a brass drift or similar.”
There is a lot of pressure flowing through the transfer tubes and nozzles during operation. Ralph Hawkins, Chief Engineer for Northstar Turbine, LLC and Chief Engineer for More Company Inc., tells AMT, “One of the things that most people don’t realize is that while the overhaul manual calls for a 125-psi spray check, when the engine is running at takeoff power, the fuel pump and fuel control are providing fuel at a pressure of 450 to 600 psi.” It is easy to see why you don’t want to damage the transfer tubes when handling them.
Here is a tip for checking the tubes for straightness — roll them across a clean, flat surface. If a tube wobbles, it is bent and needs to be replaced. Even small bends can give you problems. “We had a customer down in Florida that was swearing up and down one side and the other saying that one of the adapters we inspected was bad,” shares Boissonneault. “We sent him another adapter and he still couldn’t get it to stop leaking. He finally took the transfer tubes on both sides of the adapter out and found two of the transfer tubes were slightly bent, and it caused them to leak around the o-ring. It wasn’t bad enough to where fuel was spewing out, but it was bad enough to cause a constant drip.”
Now what?
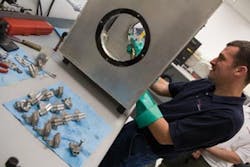
So you have removed the fuel nozzles. Now what? Well there are two options. You can perform the inspection yourself, or you can send the nozzles to a repair station that does fuel nozzle flow checks. Hawkins tells AMT, “Spray checking fuel nozzles takes skill. Nowadays, there are a number of Part 145 repair stations that will maintenance manual spray check a set of fuel nozzles for you, and their prices are surprisingly reasonable. A set of 14 is in the vicinity of $200 or $300.” If you don’t have the experience or tools to properly spray check the nozzles, send them out. A good rule of thumb — when in doubt, send them out.
If sending out the nozzles is your option, be sure to keep all hardware and transfer tubes. Make sure you pack the nozzles so that they will not be damaged during transportation by packing them individually. Some repair stations even offer shipping containers that you can ship the nozzles in to help protect them. If you are considering sending your nozzles out, call the shop to see if they provide shipping containers.
In addition, make sure the nozzles you are shipping are clean and don’t have residual fuel dripping all over them. If you send your nozzles in one big plastic bag with a big puddle of fuel in it, you are asking for trouble.
Visual inspection
If you decide to do the fuel nozzle inspection yourself, here are a few tips.
After the nozzles are removed, do a quick visual inspection. Check the tip, adapter, and sheath for visible damage. Also, check for the correct part number of the nozzle tip. “The first thing I tell mechanics is to check the tip part number,” Beaulieu tells AMT. “We have found our fair share of nozzles out there with different tips on the same set. And basically, the tip part number controls the part number of the adapter. You can change the tips from one to the next and they can go into each aircraft. It’s not Murphy proof at all — it’s dangerous. Make sure you have the correct part number on the nozzle tip.”
You never know, the last person may have put the wrong part number in.
Cleaning
The next step is to ultrasonically clean the nozzles. Clean the nozzles according to the maintenance manual. Keep in mind that P&WC specifies different cleaning solutions for simplex and duplex nozzles. Ensure you are using the correct cleaning solution for the nozzles you are cleaning. Using the wrong solution can damage the nozzles. Beaulieu explains, “The lock tab on a duplex nozzle is a silver-coated lock tab, whereas in a simplex nozzle, everything’s all stainless. The cleaning solution specified for simplex nozzles will eat away the silver coating on the lock tab on the duplex nozzles. That can create a leak between the adapter assembly itself and the nozzle tip.”
After cleaning the nozzles, rinse them out thoroughly. P&WC says to “pressure wash parts thoroughly to remove residual compound under very hot, running water for at least one minute.” It then says to immediately dry parts thoroughly using clean, filtered compressed air. Boissonneault shares a caution about using shop air, “The reason we caution against blowing shop air through nozzles is because most shop air is pretty much contaminated with oil, moisture, and dirt, and that’s the last thing you want to do is put that kind of contamination in the nozzle tip. In a controlled environment like we have where everything is filtered and dried, you won’t have a problem.”
Leak test
Next, you want to perform a leak test. The maintenance manual gives you instructions on performing the leak test as well as directions for manufacturing a blanking tube. The leak test helps locate leaks between the nozzle tip and the assembly, cracks in the weld, and other leaks.
Spray check
Now it is time for the spray check. The manual calls out the specific procedure. You want to perform the inspection with a good light source in a controlled environment. Also, remember that the fluid used in this check is flammable, so ensure proper safety and personal protective measures are complied with.
Basically, fuel nozzles are tested at two different pressures. At the lower pressure, you are looking for the basic shape of the spray pattern. At the higher pressure, you will be able to inspect for defects in the spray pattern.
There are several defects you are looking for.
Streakiness: Variation in spray quantity between different parts of the spray cone and appearing as lighter or darker streaks in spray.
Spitting: A condition which exists when large drops of unatomized fuel occur intermittently and usually on the outside of the spray cone.
Drooling: When large drops of unatomized fuel form on the nozzle face.
Void: Area of fuel spray showing discontinuity in fuel flow (air gap).
Skewness: A spray condition that is not centered, or not uniform around the spray cone.
The maintenance manual gives limits for each of the defects listed above. For some defects, additional cleaning (either with a brush or another round of ultrasonic cleaning) may resolve the problem. For those that fail inspection, new tips can be installed in accordance with the maintenance manual and re-tested.
Again, we must stress the importance of experience and know-how when it comes to performing spray checks. Some defects like streaks and voids can be difficult to identify to the untrained eye. Defects that go undetected can cause severe damage to the hot section. After successfully spray checking the nozzles, do not touch the nozzle tip. The oils on your skin will adversely affect the spray pattern.
Final inspections
After you have flow checked your nozzles, it is time for some final inspections. Inspect the sheaths for proper dimensions. Mate the sheaths and the nozzle assemblies and check that the tip is centered in the sheath opening and for proper clearances between the tip and sheath opening. Also, check to ensure the mating surface between the flat of the sheath and the flat of the nozzle assembly doesn’t have any voids.
Installation and leak check
Now that you have a good set of nozzles and sheaths, it is time to re-install the nozzles. Install them according to the maintenance manual. Make sure you install the metal gasket between the sheath and the gas generator case. It is somewhat difficult to inspect for missing gaskets after the nozzles are installed. Install the transfer tubes with new o-rings, and torque all connections to specified torque. Too little torque and you have a fuel or air leak. Too much, you can snap the bolt.
After a leak check, do one final torque and safety the hardware.
Fuel system health
Proper fuel nozzle inspection and maintenance is just part of the picture when it comes to engine health. You need to consider the health of the entire fuel system. Beaulieu shares, “You need to properly maintain your entire fuel system. Do good fuel filter inspections. Sump your tanks. Keep the total health of your fuel system in mind.”
AMT asked Hawkins what he would say the most important part of inspecting fuel nozzles is. He shared, “It’s a bunch of things. It’s first having spray pattern check done by knowledgeable mechanics or reputable facilities. But also, the operator needs to make sure that the inspection interval he is using is short enough so that when the nozzles are removed, they’re still in good condition. Whatever interval the operator is using now, if he sees bad fuel nozzles when he’s removing them, or the person that he is sending them to sees that they’re bad, then his interval is not short enough. Fuel pump filter cleaning/replacement is important. Aircraft fuel filter cleaning/replacement is important. The use of the proper fuel is important (see P&WC Engine Fuels and Additives — Requirements and Approved Listing service bulletin(s).”
Fuel nozzle inspection and maintenance must be performed meticulously. The proper operation of your fuel nozzles and the proper health of your fuel system is too critical to engine operation to do otherwise.
