3-D Laser Inspection of Jet Engine Blades
The aerospace and aviation industry require regular inspections of jet engine compressor and turbine blades to identify defects in an effort to delay expensive part replacement and prevent massive engine failure. Not surprisingly, the blades must often meet stringent and high tolerance demands imposed upon them.
Blades are designed to generate the maximum power and efficiency at the minimum weight and cost. Any shape variation from the original design can significantly impact efficiency and fuel consumption and, in certain situations, cause blade failure.
MRO inspection challenges
The ability to quickly access blade geometry can have significant impact on the performance, and repair cost in a maintenance environment. Blades are one of the most highly stressed components in a turbine or compressor. Their weight and high speed applications make them subject to tremendous centrifugal forces. Additionally, the harsh environmental conditions of temperature and pressure after long service hours can result in corrosion, erosion, distortion, and loss of the original component shape and dimensions.
To combat these conditions, turbine designers and engineers have devised effective defenses to protect their turbine blades. These include using strong exotic materials capable of withstanding high temperatures - such as nickel and cobalt based metal alloys – while innovative blade airfoil designs have improved the defenses against corrosive properties. In addition, several effective defensive coatings have been added as “armor” for the blades.
Rust never sleeps?
Every turbine engine uses fuel contaminated with sulfur. Sulfur corrosion is similar to rust resulting from oxidation of ferrous-based metals. Just as there is no way to eradicate rust-producing moisture, no one has ever designed a filter to purify turbine engine air intake completely. And once sulfur corrosion penetrates the blade’s protective layer and reaches the base metal, there is no way to reverse the process.
If the aircraft is operated near a saltwater source, the likelihood of severe damage dramatically increases. The same is true for aircraft operating near high pollution risk areas where the aircraft’s engine may intake contaminants from airborne particles.
Blade deterioration usually affects the blades in the following ways – blade edge, affecting chord length; blade thickness variation; and blade twist – the variation in twist from root to tip. Consequently, accurate measurements and analysis of airfoil section and root parameters are important in blade inspection, and yet complicated. Another critical form to inspect is the leading edge and trailing edge profiles.
The service technician and inspector are called upon to collect and analyze the intelligence data and physical evidence to determine the condition of the blades and develop a strategic plan of defense.
While there are only limited things a pilot or mechanic can do to prevent the sulfidation attacks on the turbines, just being aware of the turbine's vulnerability can justify shortening maintenance intervals.
Meanwhile, the MRO blade industry is continuously seeking high accuracy inspection, higher blade measurement speed, and minimized requirements from the operator – in an effort to extend operating intervals and keep maintenance and inspection costs to a minimum.
Current methodologies
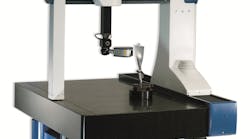
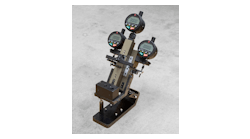
Today, mechanical touch probes on coordinate measuring machines (CMM) and mechanical profile gauges are the most common sensors employed for blade inspection, and most blade measurements today are based on this design. However, the amount of useful data that can be collected using the mechanical touch probe or a gauge is somewhat limited both in terms of hardware and measurement software.
Blade inspection is a challenge given the varying freeform geometries – which requires an inspection system to deliver both speed and precision. With free-form blade shapes, this cannot be accomplished with the use of traditional slower mechanical trigger probe solutions, which must remain in contact with the surface of the blade. Additionally, the dynamic range of a mechanical probe is basically zero, making the scanning pattern, alignment routine and programming of the scan path more complicated.
One of the key challenges of blade measurement is the “blade alignment” – finding the exact blade position in space relative to the CMM and moving the coordinate system from the CMM to the blade. It is a tricky trial and error approach, unless one is using high precision (and expensive) mechanical jigs.
The need for an efficient, accurate, and fast noncontact laser based metrology system for blade service inspection has been an industry challenge for years. While various noncontact systems exist in the market for vision, calibration, and digitizing, none has overcome the technology barriers and provided the required performance and speed to bring an efficient, fast, and accurate 3-D sensor to the blade measurement market.
And although noncontact vision systems are starting to penetrate various 3-D applications by leveraging their 2-D performance capabilities, when used for 3-D applications, the vision systems provide fast scanning, but have offered limited accuracy in the third dimension.
Advantages 3-D laser inspection
Recent advances in optical noncontact scanning devices have overcome the aforementioned challenges. The introduction of revolutionary 3-D laser inspection technology has significantly improved the inspection of blades.
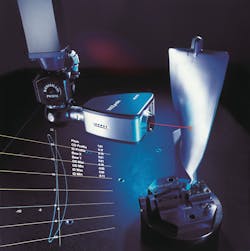
A case in point is the WIZblade turnkey metrology system developed by Nextec for rapid, high-precision measuring of aerospace jet engine blades, industrial turbine blades, and compressor blades. This solution not only overcomes the challenges of freeform blade measurement and inspection, but significantly reduces inspection time as well as offers higher accuracy. This solution provides single point precision of 12 microns and a probe feature precision of 2 microns (100 points best fit), meeting the highest precision requirements for blade measurement.
Conversely, the traditional design of laser-based probes is built around the fundamental triangulation principle. It involves the manipulation of a laser beam projected from the object through a dedicated set of optics in a fixed position and a fixed angle and an optical detector (a position sensing device - PSD or a CCD).
These sensors are very sensitive to the optical parameters of the measured object including blade color, material, glare and reflection, surface finish and relative angle between the laser beam and the object. This sensitivity generates large deviations and unreliable output in the blade measurement results.
Nextec’s WIZblade offers a real breakthrough in this area through its 3-D laser-based scanning sensor, combining advanced laser and vision technologies. Based on proprietary optics, a unique adaptive control feature and sophisticated image processing software, the probe handles all material and surface finish types. In this manner, the WIZblade transcends prior contact technology (specific precision fixtures, expensive tailored jigs and templates, mechanical trigger and scanning probes), by using the real-time adaptive control WIZprobe.
With WIZblade, the small laser spot size enables measurement of very fine geometry details that enables accurate blade section analysis of characteristics such as mean (camber) line, max thickness, leading-edge and trailing-edge radii, thickness at offsets from the blade ends, chord lengths (axial, max and parallel), and twist angles.
In conclusion, implementing this technology into a unique laser system has significantly improved the inspection of blades. Through a combination of 3-D laser-based scanning sensor, advanced laser and vision technologies, a motion controller and specialized software, WIZblade addresses the challenges of free-form blade inspection required to deliver superior blade alignment, blade measurement, blade analysis, and inspection reporting.
Danny Shacham is the director of technology for Nextec Laser Metrology as well as the founder and president of Nextec Technologies 2001 Ltd., located in Haifa, Israel -- part of the high-tech Silicon Wadi corridor -- where he is the research leader of the technology behind the Nextec solution offerings. He holds a BSc degree in Mechanical Engineering from the Technion (Israel Institute of Technology) and an MSc degree in Mechanical Engineering and Marine Engineering from the University of Michigan. He has more than 38 years experience in management of large and small scale development projects involving production, marketing and sales, customer support and business development. For more information visit www.nextec-laser.com.


